Roses (Rosa spp.) are among the most cherished ornamental plants worldwide, admired for their fragrance, vibrant colors, and versatility in gardens and landscapes. Propagating roses allows gardeners to multiply favorite varieties, save costs, and maintain plant lineage without relying on nursery-bought plants. While roses may seem delicate, they can be propagated successfully with patience and proper techniques.
This guide provides a detailed 7-step approach to propagate rose plants, covering everything from selecting suitable parent plants to caring for new cuttings and ensuring successful growth.
Step 1: Selecting Healthy Parent Plants

The first step in rose propagation is choosing a healthy and vigorous mother plant.
- Characteristics of Ideal Parent Plants:
- Disease-free, pest-free, and well-maintained plants.
- Strong, mature stems (preferably 1-year-old growth) that are neither too woody nor too soft.
- Plants that have produced abundant flowers in the previous season.
- Timing:
- Late spring or early summer is ideal for propagation in most climates, as the plant is actively growing.
- Ensure the parent plant is well-watered and healthy to increase success rates.
Selecting the right parent plant ensures vigorous cuttings and increases the chances of successful propagation.
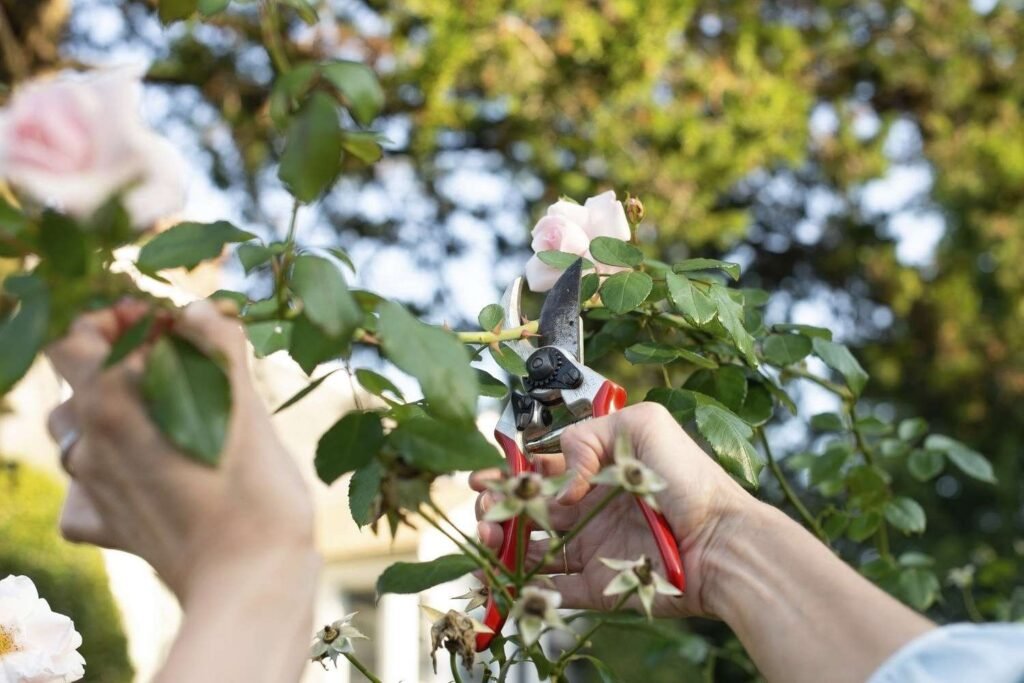
Step 2: Preparing the Propagation Material

After selecting a healthy parent plant, the next step is to prepare the propagation material.
- Choosing Cuttings:
- Select semi-hardwood stems approximately 6–8 inches long.
- Each cutting should have at least 3–5 healthy leaf nodes.
- Cutting Technique:
- Use sterilized pruning shears or a sharp knife to make a clean cut at a 45-degree angle.
- Remove flowers, buds, and extra leaves to reduce moisture loss.
- Trimming the Base:
- Remove any thorns at the lower part of the cutting.
- Make a clean cut just below a leaf node to encourage root development.
Proper preparation of cuttings ensures they are healthy, reduces the risk of infection, and improves rooting success.
Step 3: Using Rooting Hormones
Rooting hormones accelerate root formation and improve propagation success rates.
- Selecting Hormones:
- Use commercial rooting powders or gels containing auxins (e.g., IBA – Indole-3-butyric acid).
- Hormones are available in various concentrations; follow package instructions carefully.
- Application:
- Dip the cut end of the stem 1–2 inches into the rooting hormone.
- Tap off excess powder to avoid fungal growth or rotting.
Applying rooting hormones enhances the development of strong and healthy roots, speeding up the propagation process.
Step 4: Choosing the Propagation Medium
The right growing medium is crucial for root development and preventing infections.
- Soil-Based Medium:
- Use a mix of sand, perlite, and peat moss for aeration and moisture retention.
- Ensure the medium is sterilized to prevent fungal or bacterial growth.
- Container Selection:
- Use small pots, seed trays, or rooting beds with proper drainage holes.
- Avoid waterlogging, which can lead to rotting of the cuttings.
- Alternative Methods:
- Propagation can also be done in water or hydroponic systems, but soil-based media is more reliable for long-term growth.
Choosing a well-draining and sterile medium improves rooting success and reduces the risk of disease.
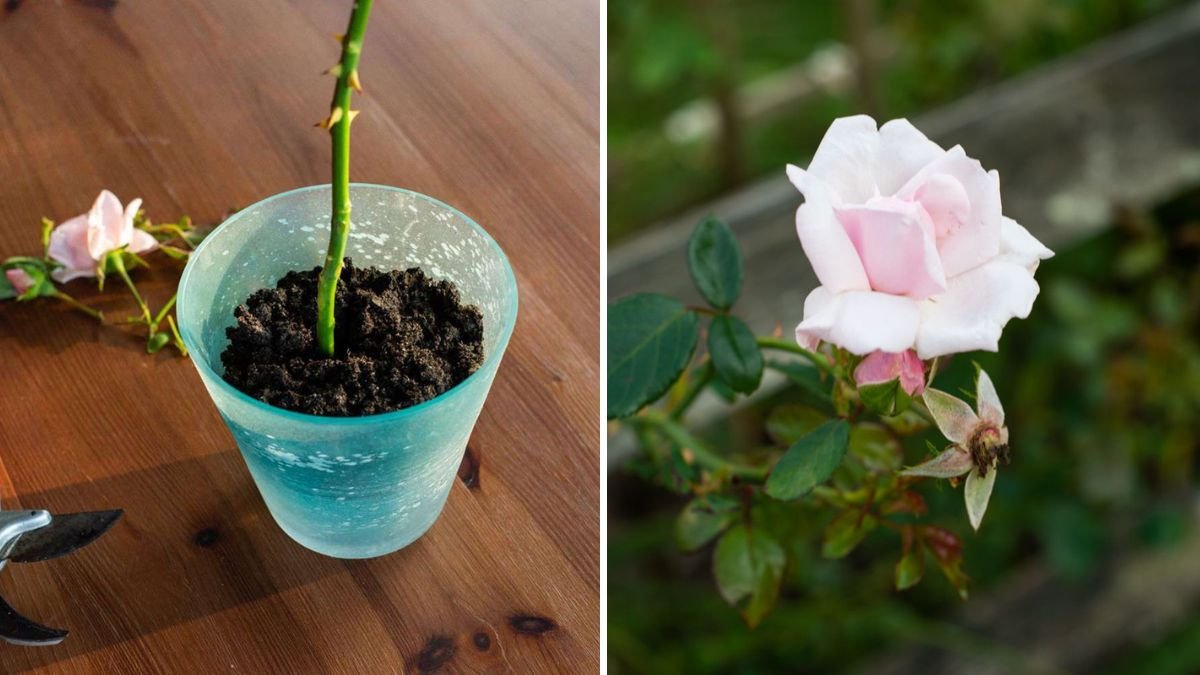
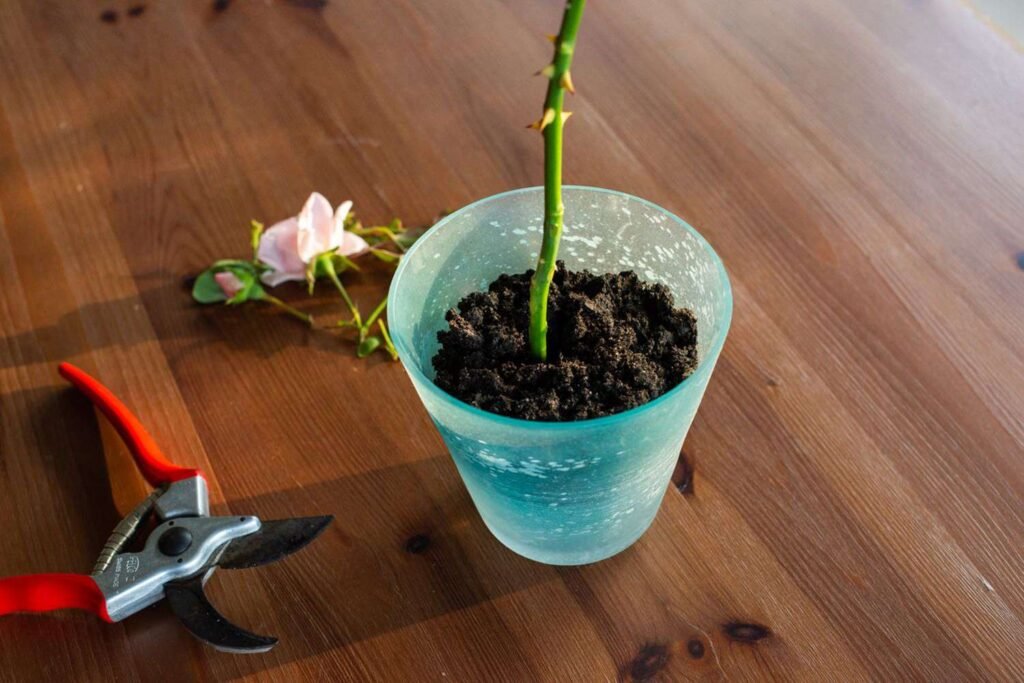
Step 5: Planting the Cuttings
Once the cuttings are prepared and rooting hormones applied, the next step is planting.
- Planting Technique:
- Insert the cutting 2–3 inches deep into the propagation medium.
- Firmly press the medium around the cutting to eliminate air pockets.
- Spacing:
- Leave adequate space between cuttings to ensure airflow and prevent mold.
- Labeling:
- Label cuttings with the rose variety and date of propagation for future reference.
Proper planting ensures stability, prevents damage, and promotes healthy root development.
Step 6: Caring for the Cuttings

Caring for rose cuttings is essential to ensure survival and root growth.
- Watering:
- Keep the medium consistently moist but not soggy.
- Mist the cuttings regularly to maintain humidity, especially in dry conditions.
- Light:
- Provide indirect sunlight or partial shade for 4–6 hours a day.
- Avoid direct harsh sunlight, which can dry out the cuttings.
- Temperature and Humidity:
- Maintain a temperature range of 70–75°F (21–24°C) for optimal rooting.
- High humidity supports leaf retention and reduces stress on the cutting.
- Pest and Disease Management:
- Monitor for fungal infections or pests like aphids.
- Use neem oil or organic fungicides if necessary.
Consistent care during the rooting phase ensures the cuttings establish strong roots and develop into healthy plants.
Step 7: Transplanting Rooted Cuttings
After roots develop, cuttings can be transplanted into permanent locations.
- Rooting Period:
- Roots generally form in 4–8 weeks depending on the variety and environmental conditions.
- Gently tug the cutting to check for resistance, indicating root formation.
- Transplanting Technique:
- Prepare a garden bed or larger container with fertile, well-draining soil.
- Dig a hole slightly larger than the root mass of the cutting.
- Plant the cutting carefully, firm the soil, and water thoroughly.
- Aftercare:
- Provide partial shade for the first week after transplanting.
- Water regularly and apply organic mulch to retain moisture.
- Fertilize with compost or balanced organic fertilizer after 2–3 weeks.
Transplanting properly ensures survival and encourages the young rose plants to establish quickly and grow vigorously.
Additional Tips for Successful Rose Propagation
- Use Healthy Tools: Sterilize all cutting tools to prevent disease transmission.
- Choose Disease-Resistant Varieties: Increases survival and reduces maintenance.
- Patience is Key: Root development can take several weeks; avoid disturbing cuttings prematurely.
- Regular Observation: Monitor for pests, disease, or signs of stress.
- Seasonal Adjustments: Propagation success is higher in spring or early summer due to favorable growing conditions.
Following these tips improves success rates and produces healthy, robust rose plants.
Benefits of Propagating Roses
- Cost Savings: Propagate favorite varieties instead of purchasing new plants.
- Preservation of Varieties: Maintain specific rose cultivars with unique colors, fragrance, and characteristics.
- Sustainable Gardening: Reduce reliance on commercially grown plants and plastic packaging.
- Continuous Flower Supply: Multiply plants for more blooms in gardens, patios, or balconies.
- Educational and Therapeutic: Provides hands-on gardening experience and a rewarding hobby.
Propagation enables gardeners to expand their rose collection sustainably while maintaining quality and beauty.
Conclusion
Propagating rose plants is a rewarding and practical way to multiply favorite varieties and create a thriving rose garden. By following these seven easy steps—selecting healthy parent plants, preparing propagation material, using rooting hormones, choosing the right medium, planting cuttings, caring for them, and transplanting rooted cuttings—you can successfully propagate roses at home.
With proper care, patience, and attention to environmental conditions, even beginner gardeners can achieve high success rates in rose propagation. This process not only enhances your garden’s beauty but also promotes sustainable and cost-effective gardening practices.
Whether you are growing roses for their fragrance, ornamental value, or sentimental significance, mastering propagation allows you to enjoy continuous blooms and a flourishing garden year after year.