Bell peppers are a vibrant, nutritious, and versatile vegetable, loved in cuisines around the world. But growing them at home can seem challenging, especially if you don’t have a traditional garden. The good news is you don’t need a yard or large pots to cultivate bell peppers. With a bit of creativity, you can create a DIY wall garden using bottles, perfect for urban spaces, balconies, patios, and even indoor kitchens. This method has gained popularity in both the US and Europe, combining sustainability, vertical gardening, and aesthetic appeal. In this article, we’ll explore the step-by-step process of growing bell peppers in bottles, along with expert tips for maximizing growth and yield.
Why Grow Bell Peppers at Home?
Homegrown bell peppers offer several benefits that make the effort worthwhile:
- Freshness: You get the freshest, most flavorful peppers straight from your wall garden.
- Nutrition: Bell peppers are rich in vitamin C, antioxidants, and dietary fiber.
- Cost-Effective: Growing your own vegetables reduces grocery bills.
- Urban Gardening Friendly: Perfect for apartments, balconies, or small outdoor spaces.
- Sustainability: Repurposing bottles for planting reduces plastic waste and promotes eco-friendly gardening.
Whether you love red, yellow, or green bell peppers, a wall garden can provide a continuous supply while adding beauty to your space.
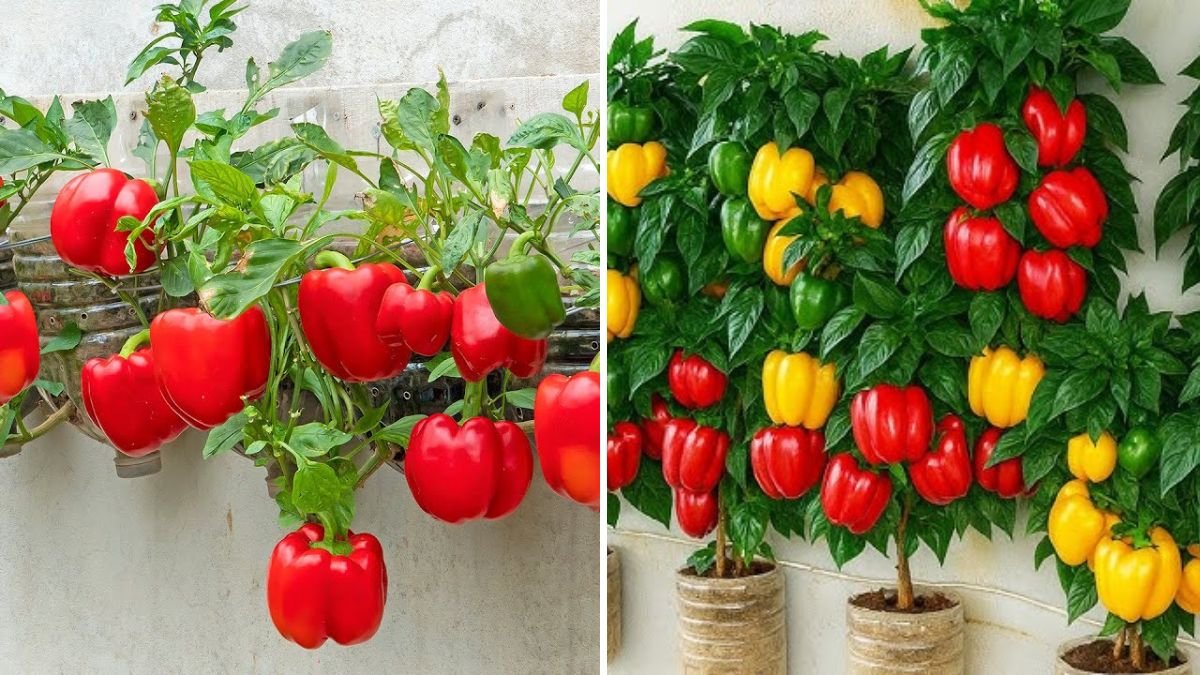
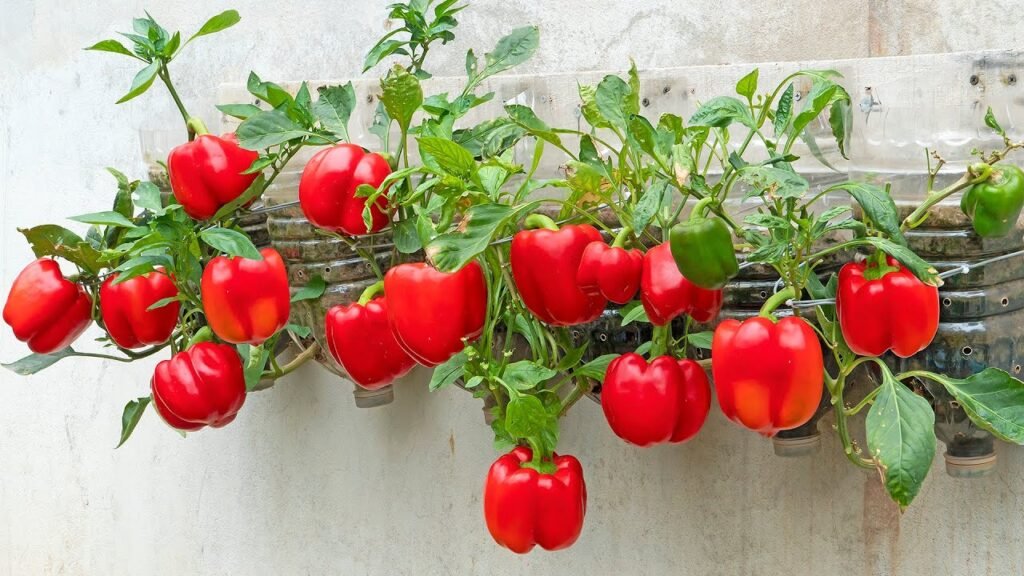
Choosing the Right Bottles
The first step in building a wall garden is selecting appropriate bottles. Most DIY gardeners prefer using plastic bottles due to their lightweight nature and availability.
- Size: Use bottles of at least 1.5 liters for adequate space for roots and soil. Larger bottles are even better for bigger plants.
- Material: Ensure the bottles are food-grade and free from harmful chemicals.
- Transparency: If possible, avoid clear bottles for planting, as roots prefer darkness. Alternatively, wrap the bottles in opaque material.
Reusing bottles not only reduces waste but also makes this gardening method inexpensive and accessible.
Preparing the Bottles for Planting
Once you have your bottles, preparation is key to ensure healthy bell pepper growth.
- Cutting the Bottles:
- Cut a window or opening on the side of the bottle to plant the seedlings and allow easy access for watering.
- Leave the top intact if you plan to use it for water drainage or support.
- Drainage:
- Drill or poke holes at the bottom of the bottle to prevent waterlogging. Proper drainage is essential to avoid root rot and fungal diseases.
- Mounting Holes:
- If you plan to hang the bottles vertically, create holes near the top or sides to attach ropes, wires, or hooks.
Soil and Fertilizer
Bell peppers are heavy feeders, so choosing the right soil mix and fertilization method is critical.
- Soil Mix: Use a well-draining potting mix combined with compost or organic matter. A typical mix could include:
- 50% high-quality potting soil
- 30% compost or well-rotted organic matter
- 20% perlite or sand for drainage
- Fertilizer: Bell peppers benefit from balanced nutrients. Incorporate a slow-release organic fertilizer into the soil during planting, and consider additional liquid feeding every 2–3 weeks once plants start flowering.
Good soil and nutrients ensure strong root development, vigorous growth, and higher yields.
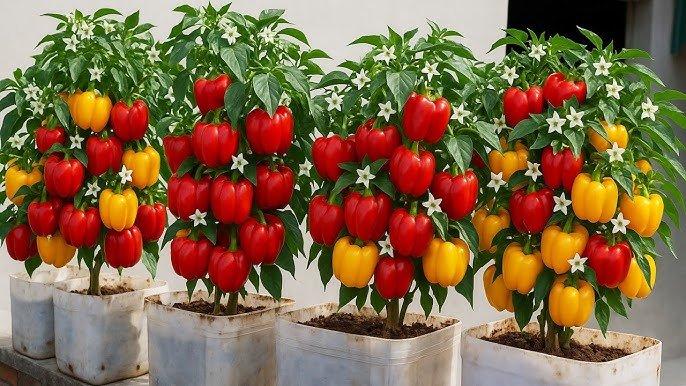
Choosing the Right Bell Pepper Varieties
Not all bell peppers are suitable for container or vertical growth. Choose compact or dwarf varieties for wall gardens:
- ‘Mini Bell’ or ‘Baby Bell’ Varieties: Ideal for small containers.
- ‘California Wonder’ or ‘Yolo Wonder’: Can grow well in medium-sized bottles with proper care.
- ‘Sweet Bite’ or ‘Snack’ Varieties: Great for continuous harvest in vertical setups.
Selecting the right variety ensures that your wall garden remains manageable while producing a bountiful harvest.
Planting Bell Peppers in Bottles
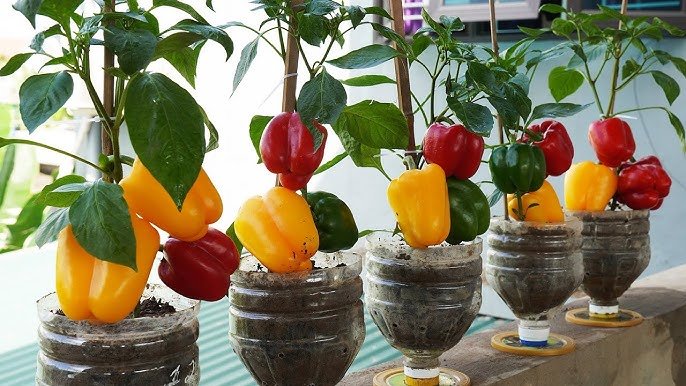
- Seedlings vs. Seeds: While seeds can be started directly in bottles, using young seedlings is faster and increases survival rates.
- Planting Depth: Place the seedlings deep enough to cover the roots entirely, leaving the first set of leaves above soil.
- Spacing: One plant per bottle is usually sufficient. For larger bottles, you can experiment with two small seedlings.
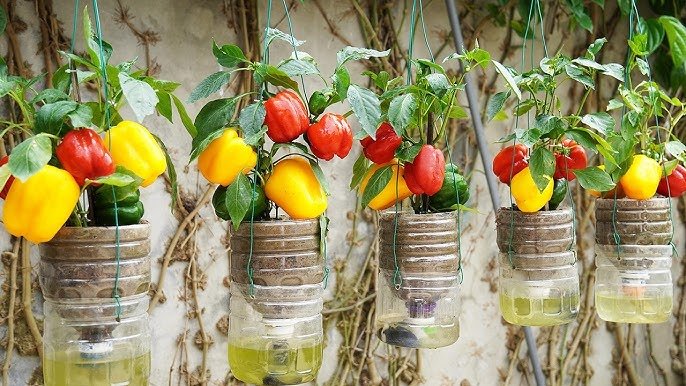
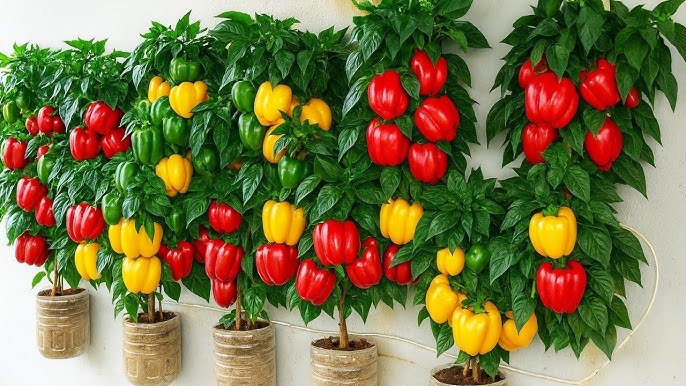
Vertical Wall Garden Setup
Creating a wall garden requires careful arrangement to maximize space and sunlight exposure:
- Choosing a Wall:
- Select a sunny wall with at least 6–8 hours of sunlight per day. South-facing walls work best in the northern hemisphere.
- Ensure the wall can support the weight of filled bottles.
- Mounting System:
- Rope or wire systems: Hang bottles vertically with sturdy ropes or wires anchored securely.
- Shelves or racks: Alternatively, arrange bottles on shelves or tiered racks for an attractive display.
- Positioning:
- Ensure bottles are slightly angled downward to improve drainage.
- Leave space between bottles for airflow and sunlight penetration.
Watering and Maintenance
Bell peppers grown in bottles require consistent care for healthy growth:
- Watering:
- Water regularly to keep the soil moist but not soggy.
- Smaller containers dry out faster, so check soil daily during hot weather.
- Mulching:
- Add a thin layer of organic mulch to retain moisture and reduce temperature fluctuations.
- Fertilizing:
- Apply liquid fertilizer every 2–3 weeks to provide essential nutrients during flowering and fruiting.
- Pruning:
- Remove dead or yellowing leaves to promote airflow and prevent disease.
- Pinch early flowers to encourage stronger root and vegetative growth before fruiting.
Pollination
Bell peppers need pollination to set fruit. Outdoor wall gardens often rely on wind and pollinators, but indoor or sheltered setups may require hand pollination:
- Use a small brush or cotton swab to transfer pollen from male to female flowers.
- Lightly shake the plants to help distribute pollen naturally.
Proper pollination ensures more fruit and prevents flower drop.
Harvesting Bell Peppers
The reward for your efforts is a colorful, healthy harvest. Harvest tips include:
- Maturity: Pick peppers when they reach full color (red, yellow, or orange depending on the variety). Green peppers can also be harvested but may be less sweet.
- Frequency: Regular harvesting encourages continued fruiting. Check plants every 2–3 days.
- Technique: Use scissors or a small knife to cut peppers from the stem, avoiding damage to the plant.
With proper care, a wall garden can produce a continuous supply of bell peppers for months.
Benefits of a Bottle Wall Garden
- Space-Saving: Perfect for small apartments, balconies, or patios.
- Aesthetic Appeal: Creates a green, vibrant vertical display.
- Sustainability: Reuses plastic bottles and reduces food miles.
- High Yield: Vertical orientation allows more plants in a limited area.
- Accessibility: Easy to care for, harvest, and enjoy fresh produce.
Tips for Success
- Rotate bottles periodically to ensure all sides get sunlight.
- Keep a consistent watering and feeding schedule.
- Support vines if using larger pepper varieties to prevent bending or breakage.
- Experiment with companion planting, such as herbs or flowers, to repel pests naturally.
Conclusion
A DIY wall garden using bottles is a fantastic way to grow bell peppers without a traditional garden. It’s eco-friendly, space-saving, visually appealing, and highly productive. By carefully choosing containers, soil, and plant varieties, and following proper care techniques, you can enjoy a continuous harvest of fresh, sweet bell peppers right at home.
Whether you live in an urban apartment in the US or a small European balcony, this innovative approach allows anyone to enjoy homegrown vegetables without a yard. With a little creativity, patience, and dedication, your bottle wall garden can become a thriving vertical farm and a source of pride, beauty, and delicious produce.