
Chili peppers are a staple in kitchens worldwide, adding flavor, spice, and health benefits to dishes. Rich in vitamin C, antioxidants, and capsaicin, they boost immunity, aid digestion, and even support metabolism. But many people think growing chilies requires large gardens, expensive pots, or constant care.
The YouTube video “Can’t Believe! Grow a Whole Garden of Chili Peppers Year Round Using Just a Few Old Plastic Bottles!” demonstrates a simple, space-saving, and sustainable method to cultivate chili peppers at home using recycled plastic bottles. This method not only saves space and money but also allows gardeners to harvest fresh, spicy chilies year-round.
In this blog post, we’ll explore step-by-step how to grow chili peppers in plastic bottles and tips to maximize yield and flavor.
Why Grow Chili Peppers in Plastic Bottles?
Growing chilies in plastic bottles has several advantages:
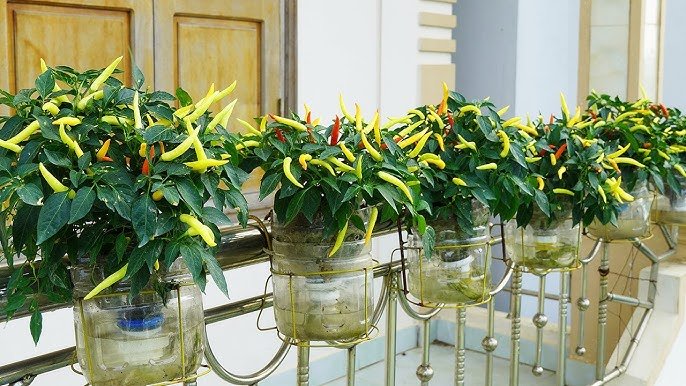
- Space-Saving: Perfect for terraces, balconies, or small spaces.
- Year-Round Harvest: Continuous growth ensures fresh chilies every season.
- Cost-Effective: Recycle old bottles and avoid buying expensive pots.
- Reduced Pests: Elevated bottles reduce soil-borne pests and fungal problems.
- Easy Care: Lightweight, movable bottles make watering, fertilizing, and harvesting easy.
Plastic bottle gardening makes homegrown chili peppers accessible to everyone, even beginners.
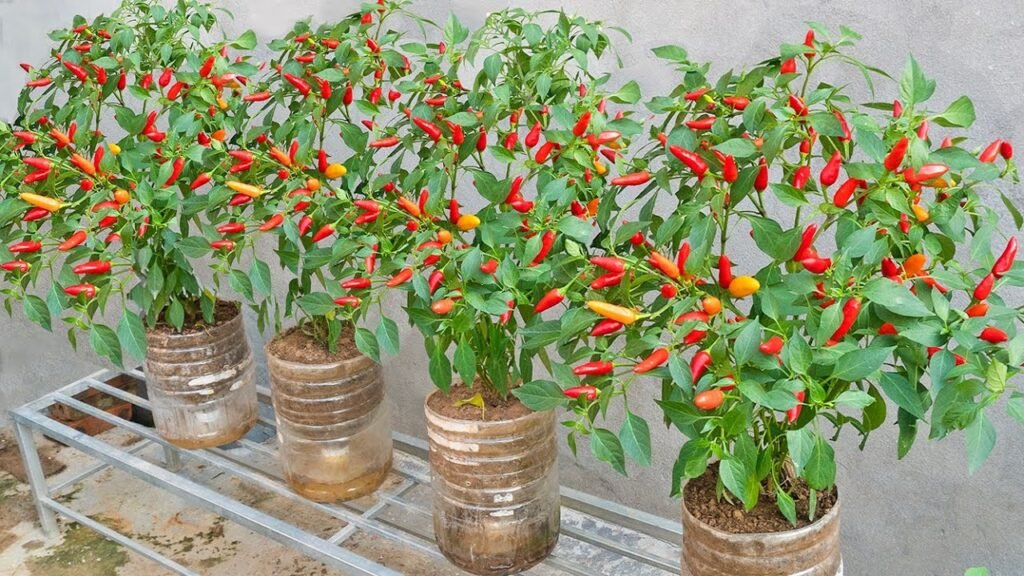
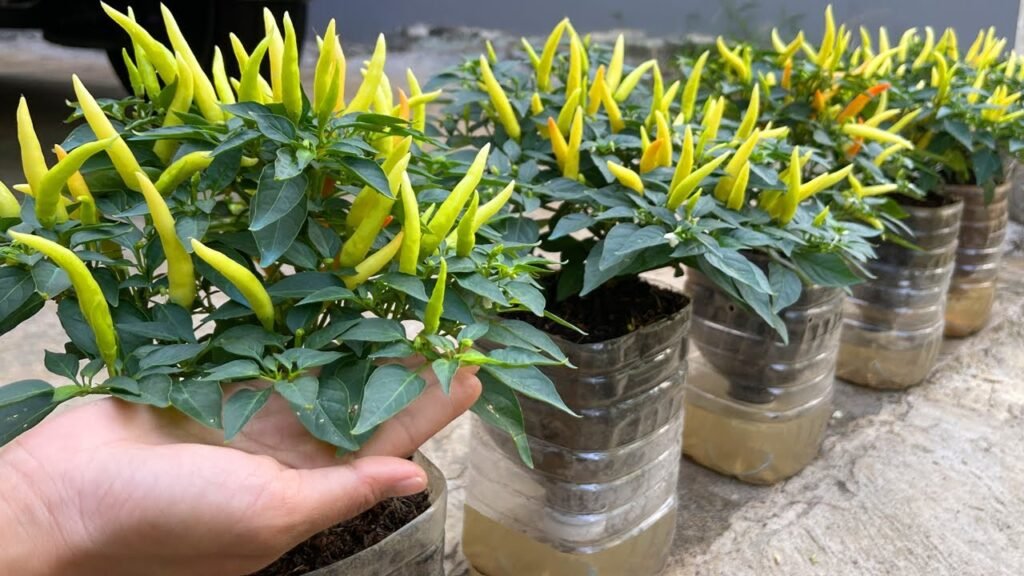
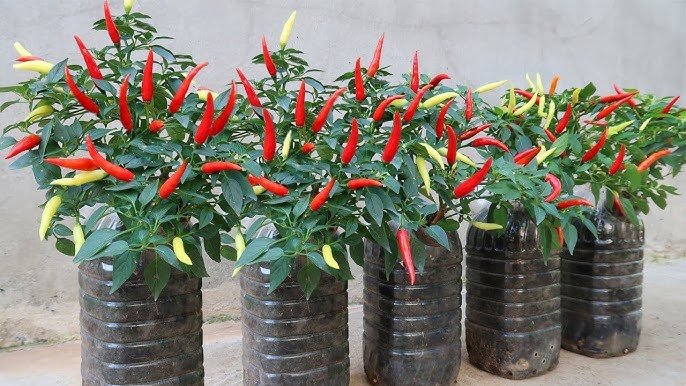
Step 1: Selecting the Right Plastic Bottles
- Use 1–2 liter plastic bottles, ideally transparent or semi-transparent.
- Cut the bottle in half or create a planting section at the top and a water reservoir at the bottom.
- Ensure proper drainage holes at the base to prevent waterlogging.
- Larger bottles accommodate more soil and larger plants for higher productivity.
Proper bottle selection ensures healthy roots and thriving chili plants.
Step 2: Preparing the Growing Medium
Chili peppers thrive in nutrient-rich, well-draining soil.
Recommended Soil Mix:
- 40% garden soil or loamy soil
- 30% compost or well-rotted manure
- 20% cocopeat or peat moss for moisture retention
- 10% sand for aeration
Optional: Add bone meal or neem cake to boost nutrients and protect against pests.
The right soil mix ensures strong root development and continuous fruiting.
Step 3: Selecting Seeds or Seedlings
- Choose high-quality chili seeds or seedlings from a reliable nursery.
- Popular varieties include bird’s eye chili, cayenne, jalapeño, and local hot varieties.
- For faster results, seedlings are recommended, but seeds can also be sown directly in bottles.
Healthy seeds or seedlings guarantee strong growth and high yield.
Step 4: Planting Chili Peppers in Bottles
- Fill the bottle with the soil mix, leaving 2–3 inches at the top.
- For seeds: Sow ½ inch deep and cover lightly with soil.
- For seedlings: Transplant gently, ensuring the root ball is fully covered.
- Water lightly after planting to settle the soil.
Proper planting ensures roots establish quickly and plants thrive.
Step 5: Sunlight Requirements
Chili peppers need full sunlight for 6–8 hours a day:
- Place bottles in a sunny terrace, balcony, or near a bright window.
- In hot climates, provide partial shade during peak afternoon hours to prevent leaf scorching.
- Adequate sunlight promotes healthy leaves, strong stems, and abundant fruiting.
Sunlight is essential for flavorful, spicy chilies.
Step 6: Watering Chili Peppers
Maintaining consistent moisture without overwatering is key:
- Water 2–3 times a week, adjusting for weather and indoor/outdoor conditions.
- Use the bottle’s water reservoir for slow, consistent watering if set up as self-watering.
- Mulch the soil surface with straw or leaves to retain moisture and reduce evaporation.
Proper watering supports steady growth and prevents stress that reduces fruiting.
Step 7: Fertilization for High Yield
Chili peppers benefit from regular feeding, especially during flowering and fruiting:
- Apply organic fertilizers such as vermicompost or cow dung every 2–3 weeks.
- Use nitrogen-rich fertilizers in early stages for leafy growth.
- Switch to potassium and phosphorus-rich fertilizers during flowering and fruiting for larger, spicier chilies.
- Avoid over-fertilization to prevent soft stems and poor fruit quality.
Balanced fertilization ensures vibrant, productive plants all year round.
Step 8: Supporting the Plants
Chili plants often need support as they grow and produce heavy fruits:
- Use small stakes, bamboo sticks, or twine inside the bottle to support the stem.
- Tie the main stem gently to prevent bending or breaking.
- Proper support ensures plants stay upright and maximize sunlight exposure.
Support improves fruit set and reduces plant stress.
Step 9: Pest and Disease Management
Even in bottles, chilies can face pests and diseases:
| Problem | Solution |
|---|---|
| Aphids | Spray neem oil or garlic-chili solution |
| Whiteflies | Use yellow sticky traps or organic insecticides |
| Fungal issues | Ensure drainage, remove affected leaves |
| Thrips | Handpick or use neem-based sprays |
Regular monitoring keeps plants healthy and highly productive.
Step 10: Harvesting Chili Peppers
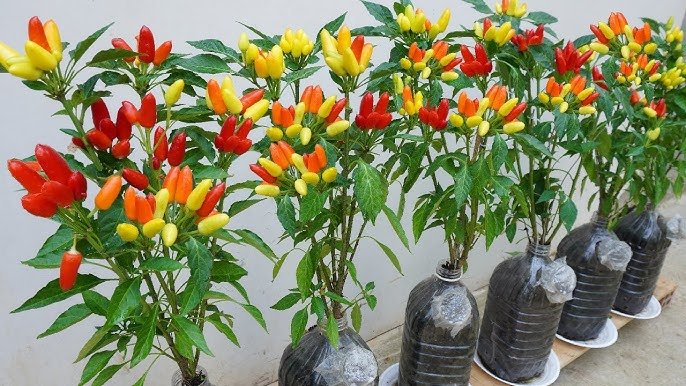
- Harvest when chilies reach the desired color (green, red, or yellow depending on variety).
- Use scissors or gently twist off fruits to avoid damaging stems.
- Regular harvesting encourages continuous flowering and fruiting.
With proper care, one bottle can produce dozens of chilies over months, providing a year-round supply.
Step 11: Benefits of Growing Chilies in Plastic Bottles
- Recycling: Repurposes old plastic bottles, reducing waste.
- Space Efficiency: Ideal for small urban homes.
- Year-Round Harvest: Ensures a continuous supply of fresh chilies.
- Reduced Water Needs: Self-watering or minimal irrigation possible.
- Cost-Effective: Low investment with high returns in taste and nutrition.
This method is eco-friendly, economical, and highly productive.
Step 12: Tips for Continuous Productivity
- Succession Planting: Plant new seeds or seedlings every few weeks.
- Pruning: Remove yellow or damaged leaves to improve air circulation.
- Fertilization: Maintain nutrient levels during flowering and fruiting.
- Regular Monitoring: Check for pests and diseases weekly.
Following these tips ensures lush, spicy chili peppers all year round.
Step 13: Why Gardeners Are Surprised by This Method
- Minimal space and resources are needed.
- Old plastic bottles can produce highly productive chili plants.
- Continuous harvest keeps your kitchen stocked without relying on the market.
- Urban gardeners can enjoy fresh, flavorful chilies year-round.
The method is a perfect combination of sustainability, simplicity, and productivity.
Conclusion: Grow a Chili Garden Anywhere with Plastic Bottles
Growing chili peppers in plastic bottles is a game-changer for home gardeners. With minimal space, proper soil, sunlight, watering, and fertilization, anyone can enjoy lush, high-yield chili plants year-round.
Whether you live in an apartment, terrace, or small balcony, this method ensures fresh, spicy chilies on demand, making your kitchen flavorful and your garden productive. Start recycling your old bottles today and watch a mini chili garden flourish before your eyes!