Mulching is one of the simplest yet most effective ways to keep a garden healthy and looking beautiful. While many gardeners associate mulching with spring, fall is actually one of the best times to give your garden beds a fresh layer of protection. The cooler months bring challenges like frost, fluctuating soil temperatures, weeds preparing for next spring, and potential nutrient loss. With the right mulching techniques, you can prepare your garden beds for winter and ensure your plants thrive when the growing season returns.
In this article, we’ll cover why mulching in fall is essential, the best materials to use, step-by-step application methods, and common mistakes to avoid. By the end, you’ll know exactly how to mulch your garden beds properly for maximum benefit.
Why Mulching in Fall Matters

Applying mulch in fall does more than just make your garden look neat—it plays a protective and practical role:
- Insulates the Soil
Mulch acts as a natural blanket, helping regulate soil temperature. It prevents sudden freezing and thawing cycles that can harm plant roots in winter. - Retains Moisture
Even though fall brings cooler temperatures, your plants still need consistent moisture. Mulch reduces evaporation, keeping the soil hydrated longer. - Prevents Erosion
Autumn rains and winter snowmelt can wash away topsoil. Mulch holds it in place and reduces runoff. - Suppresses Weeds
Many weed seeds germinate in fall and overwinter in soil. A mulch layer smothers them before they take root. - Adds Organic Matter
Organic mulch breaks down over time, enriching the soil with nutrients that will feed your plants in spring. - Protects Perennials and Bulbs
Tender perennials and bulbs like tulips, daffodils, and lilies benefit from the added insulation, reducing the risk of frost damage.
Choosing the Right Mulch for Fall
Not all mulch is created equal. Each type has its strengths depending on your garden’s needs.
1. Organic Mulches (Best for enriching soil)
- Shredded leaves: Free, abundant in fall, and excellent at enriching soil. Chop them before applying to prevent matting.
- Compost: Adds nutrients while protecting soil. Best when layered thinly beneath another mulch.
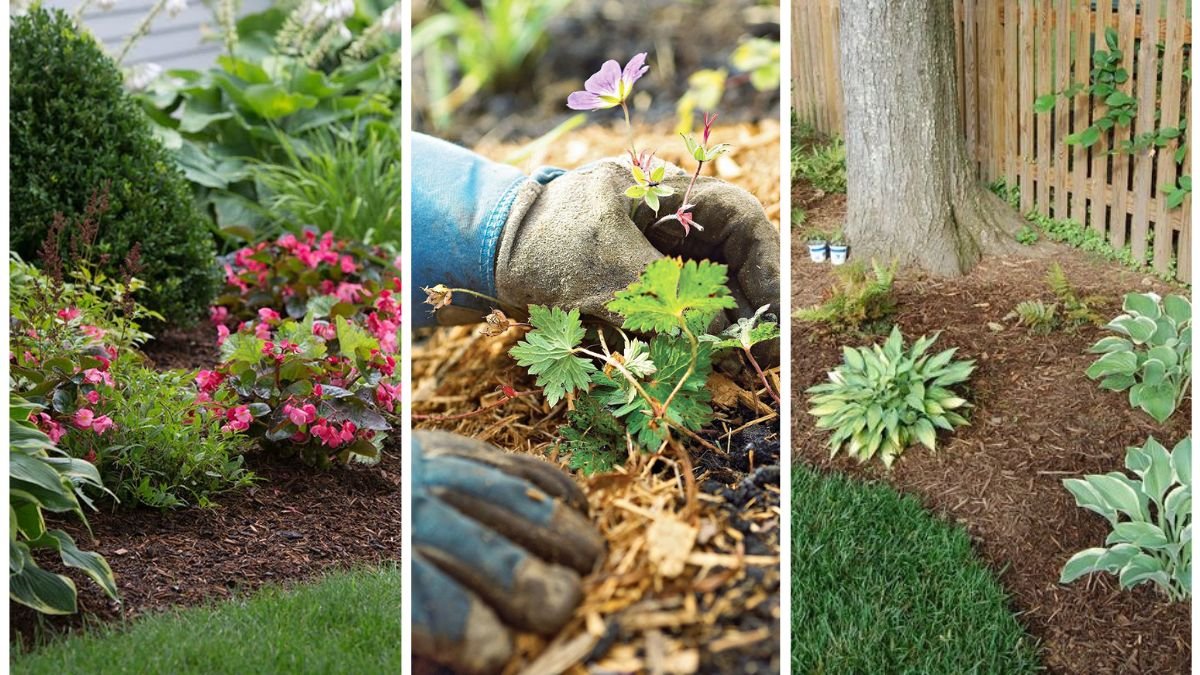
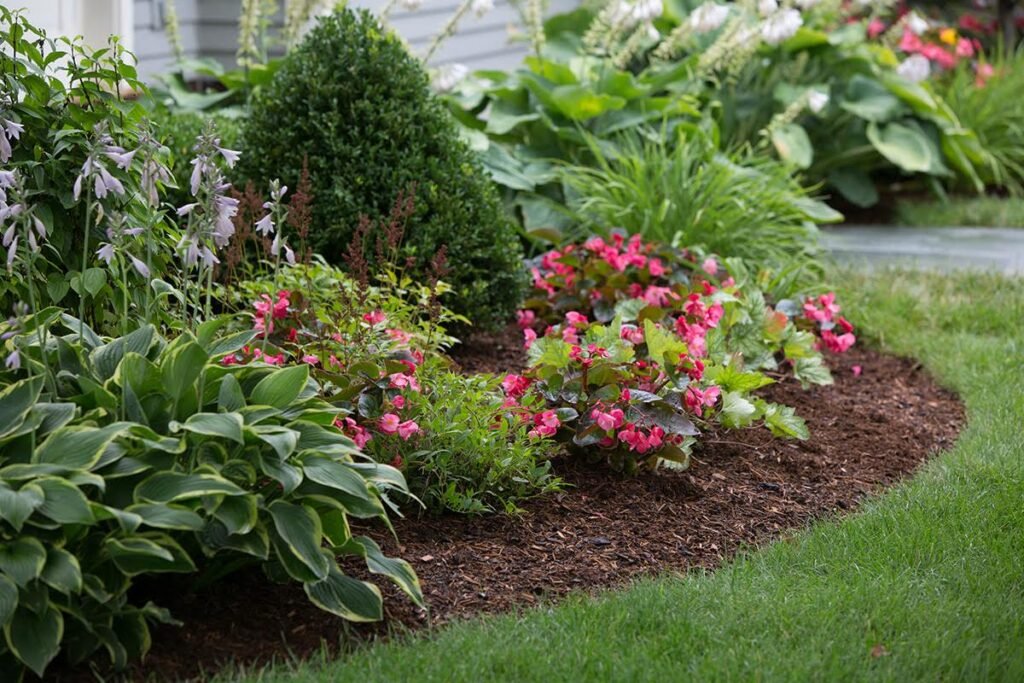
- Bark chips or shredded wood: Long-lasting and attractive. Ideal for flower beds and pathways.
- Straw: Light, insulating, and great for vegetable beds. Avoid hay, as it often contains weed seeds.
- Pine needles: Acidic and slow to decompose. Perfect for acid-loving plants like azaleas and blueberries.
2. Inorganic Mulches (Best for long-term coverage)
- Gravel or stone: Excellent for preventing erosion and providing permanent coverage, though they don’t add nutrients.
- Landscape fabric with mulch topping: Helps suppress weeds in low-maintenance beds but should be used carefully to allow soil breathing.
Pro Tip: For fall specifically, shredded leaves, straw, and bark are the most effective, as they insulate and break down naturally to improve soil health.
When to Mulch in Fall
Timing is everything. Mulching too early can attract pests, while mulching too late may not provide enough protection.
- Best time: After the first frost but before the ground completely freezes.
- This ensures plants are dormant but the soil is still workable.
- In most regions, this falls between late October and mid-November.
Step-by-Step Guide: How to Mulch Garden Beds in Fall
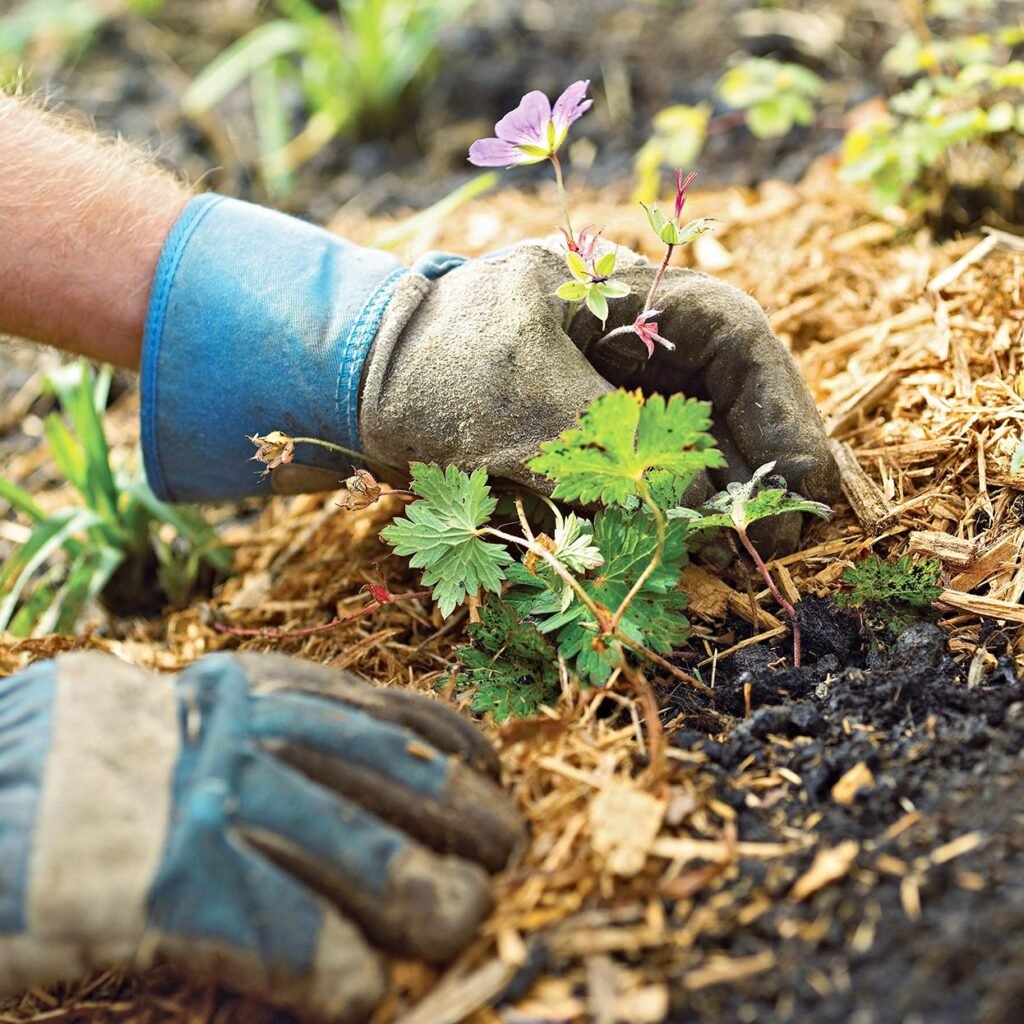
Step 1: Clean the Beds
Remove weeds, spent plants, and debris. Rake up any diseased leaves (like those affected by powdery mildew) and discard them away from your compost pile.
Step 2: Water the Soil
Moist soil helps plants store energy before dormancy. Give your beds a thorough watering before mulching, especially if rainfall has been scarce.
Step 3: Add Compost or Fertilizer (Optional but Recommended)
Spread a thin layer of compost or slow-release organic fertilizer before mulching. This gives your plants an extra nutrient boost for spring.
Step 4: Apply Mulch Evenly
- Spread mulch in a layer 2–4 inches thick.
- Avoid piling it higher, as too much mulch can suffocate plant roots.
Step 5: Keep Mulch Away From Plant Crowns and Tree Trunks
- Leave a 2–3 inch gap around the base of perennials and shrubs.
- For trees, avoid the dreaded “mulch volcano”—mulch piled against trunks leads to rot and pests.
Step 6: Tidy the Edges
Create clean edges for a neat appearance. This also prevents mulch from spilling onto paths or lawns.
Special Considerations for Different Garden Types
1. Vegetable Beds
- Use straw or shredded leaves to insulate soil and protect root crops like carrots, beets, and parsnips that can be harvested into winter.
- Mulch garlic cloves planted in September or October to insulate them until spring.
2. Flower Beds
- Bark mulch or shredded wood provides a polished look while protecting perennials.
- Cover bulb beds with shredded leaves for extra insulation.
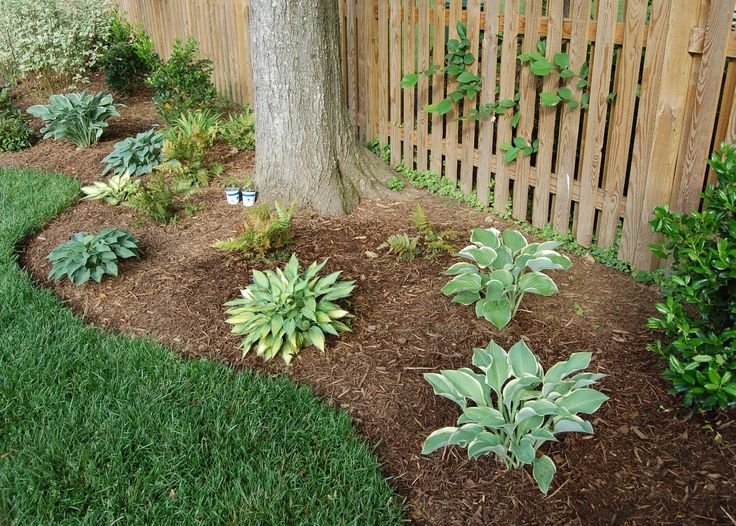
3. Shrubs and Trees
- Spread mulch in a wide circle around the drip line, not just near the trunk.
- Use wood chips for longer-lasting coverage.
4. Container Gardens
- Top pots with pine needles, straw, or shredded leaves to protect roots from fluctuating temperatures.
Common Mulching Mistakes to Avoid
Even with good intentions, many gardeners make errors that reduce mulch effectiveness.
- Piling Too High
More than 4 inches traps moisture and deprives roots of oxygen. - Mulching Against Trunks or Crowns
Causes rot, fungal issues, and pest infestations. - Using Fresh Grass Clippings
They compact, create odor, and encourage mold. Compost them first. - Skipping Weed Removal
Weeds under mulch will still grow and become harder to control later. - Using Hay Instead of Straw
Hay often introduces invasive weed seeds into beds.
Bonus Tips for Fall Mulching Success
- Shred Your Leaves: Run over fallen leaves with a lawnmower before applying. Whole leaves can mat down and prevent water penetration.
- Mix Materials: Combine compost with shredded bark for both nutrition and weed suppression.
- Refresh Existing Mulch: If you already mulched in spring, simply top it up with an inch or two rather than starting from scratch.
- Mark Tender Plants: Use stakes or markers before mulching heavily so you don’t accidentally damage them when cleaning beds in spring.
The Long-Term Payoff of Fall Mulching
While fall mulching requires a bit of effort now, the rewards in spring are undeniable. Your soil will be healthier, your plants better protected, and weeds significantly reduced. Mulching also saves time and labor later, as you’ll spend less time watering, weeding, and repairing weather-damaged soil.
Think of it as tucking your garden into bed for the winter—cozy, nourished, and ready to wake up thriving when the warmer days return.
Conclusion
The right way to mulch your garden beds in fall isn’t complicated, but it does require attention to timing, materials, and proper application. By cleaning beds, watering soil, applying the correct mulch in the right thickness, and avoiding common mistakes, you set your garden up for long-term success.
As winter settles in, you’ll know your garden is safe beneath its protective blanket of mulch—quietly resting, building strength, and preparing to burst back to life with vigor in spring.
So this fall, grab your rake, collect those leaves, and give your garden the gift of mulch. It’s one of the easiest, most effective steps you can take for a healthier, more beautiful landscape year after year.